Growing Thai Basil guide – How to grow Thai Basil effectively?
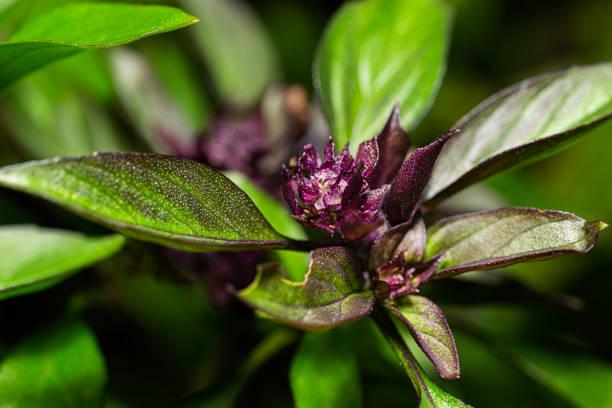
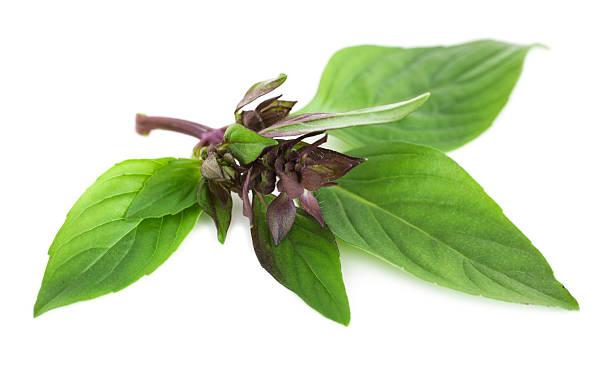
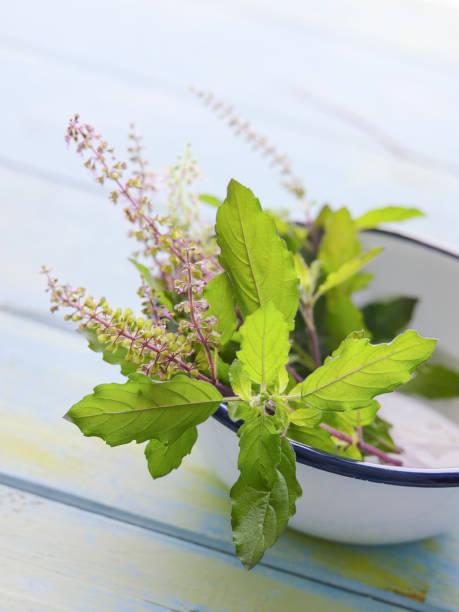
Are you thinking of growing Thai Basil in your garden? The basil leaves have all the popularity in Thai dishes and many Southeast Asian dishes. Now they are added to so many dishes all over the world. The Thai basil has purple-colored stems and leaves, a decussate form of green leaves, and flowers in the shade of purple and pink color that usually are seen blooming during the summertime.
Quick takeaways:
- Thai basil known by the other name sweet basil, has the scientific name Ocimum basilicum and common names licorice basil, anise basil, and chi neang vorng.
- Thai basil is seen with thin leaves that have a spicy flavor with a hint of licorice. Thai basil can be grown by using its seeds or by using cuttings.
- The process of Growing Thai Basil is easy. Make sure the plant receives plenty of sunlight to grow well.
- It is also evident that growing Thai basil using cuttings gives more efficient results.
- If you want to grow Thai basil in your garden like other types of basil or pot, here is the guide that will help you out completely.
- The hardiness zone of Thai basil is also 10-11.
So, what else do you need? Let’s get started.

Growing Thai Basil inside the house
If you have decided to plant Thai basil indoors then it’s surely a great idea because that basil really seems to grow best indoors.
- A window that gets a good amount of sunlight like a south-facing window would work well to place the plant.
- Thai basil needs to be planted in a pot with a good amount of drainage holes.
- Good drainage of water is water Thai basil needs to thrive well.
- Now you can simply plant the seed or seedling according to your need.
- Water regularly till the plant gets to large size. Avoid overwatering.
- Frequently watering but lightly will help the growth be good and growing plant to get daily moisture to absorb the nutrients
Growing Thai basil outside the house
Thai basil when outdoors thrives only if it gets enough sunlight and moist soil that is drained well but not soggy for too long.
- The soil is slightly acidic and seems to be beneficial for Thai basil plants.
- You should plant Thai basil outdoors once the last frost is over and there is no more risk of frosting.
- Otherwise, you should stick to planting indoors until the last frost.
How to propagate Thai basil?
Thai basil can be propagated in three ways:
1. By seeds
One of the ways for growing Thai basil is via seeds. For sowing the Thai basil seeds just press them deep about half an inch into the soil. Thai basil can be grown from seeds but the results sometimes don’t appear.
Many gardeners sow multiple seeds due to this reason. The space between the Thai basil should be good enough which is about 10-12 inches so that seedlings get enough space, air, moisture, and sunlight.
The seedlings will appear in a week or 1-1/2 weeks. Then the lost frost can be transplanted.
2. By cuttings
One of the ways for growing Thai basil is via cuttings. Using the stem cutting of Thai basil plants is another way to easily propagate Thai basil plants. Use a sharp clean sterilized knife to cut the stem in the middle of about 3-4 inches and make sure the cutting has about 1-2 foliage including nodes.
Insert the node in a jar of water and wait for a few days until you will see the tiny roots emerging from the cutting. Move the cutting into the soil with roots, soil on top of the roots, and let the plant grow.
Basil is an annual herb that will thrive if the conditions are warm and hot but during the scorching summers, little cold conditions provided to it is always a great idea. Make sure there is no risk of frost anymore! The Thai basil reaches up to a height of 45cms and yields colored leaves
How to grow Thai basil effectively?
1. Sunlight
When ti comes to growing Thai basil, then you have to make sure that full sun needs to be given to Thai basil for at least 6-7 hours a day enough to make it healthy.
Even though Thai basil gets some shade during the peak hours of heat in a day, that is completely fine but not for a long time which can make the plant yield less amount of leaves and quality also decreases.
2. Soil
For growing Thai basil in your home yard, you have to feed the plant with good-drained soil. The Thai basil needs to be planted in sandy soil with less clay and more drainage.
You also need to add a good amount of compost and manure to the soil. The soil should be moist and have a pH of 6.5 to 7.5.
3. Water
You need to water Thai basil daily as the summer heat dries out the soil too quickly but indoor plants need water less frequently. For growing Thai basil in your home yard, you have to feed the plant with water.
Don’t water from above, I mean overhead watering that can make the leaves wet and cause fungal infection. The herbs should stay dry and the roots get enough water.
4. Fertilizer
Liquid fertilizer should be supplied to the soil having Thai basil on a regular basis in light quantity. For growing Thai basil in your home yard, you have to feed the plant with fertilizer that suits the growth of the plant.
Thai basil needs high nitrogen and also seaweed solution in the soil will do wonders for the Thai basil
5. Companion planting
For growing Thai basil in your home yard, you can try to plant its companions too. The Thai basil thrives and grows extraordinarily well in the presence of some plants near it like tomatoes, rosemary, parsley, chives, and cilantro.
6. Transplantation of Thai basil
Add a good amount of compost before the plant is getting transplanted so that the plant doesn’t get any shock and the soil is moist enough with proper drainage.
How to Care for Thai Basil?
1. Pruning Thai basil
After the month of planting Thai basil, the plant will get to a good height and width. You can cut the basil after one month with pruning shears or sharp clean scissors.
You can pick the tip of the plant to elevate more growth. Removing the old leaves regularly will make the plant bushier.
Remove the flowers if you want the plant bushy. Prune off the plant half the stem after the season. The leaves and seeds can be kept dried and used next year. The Thai basil dried leaves are used in many bowl dishes, soups, salads, etc.
2. Harvesting Thai basil
After growing Thai basil, it needs to be harvested. Thai basil after the flowering season will shed the flowers that have turned brown. Collect them all and remove the heads and let them dry more.
Rub the heads and the seeds will spread out on the flower. You can keep the sheet below. Collect them and keep them in a dark, cool, dry place.
3. Pests and problems
Snails and slugs are seen attacking the fresh Thai plants. Aphids also attack Thai basil and especially the young parts of the plants under the surface of the leaves too.
Fungal infections like fusarium wilt is a common disease in Thai basil plants. Don’t let the water stand for long in the soil and the leaves need to be kept dry.
You can spray some organic or neem oil on the plants. For snails, use a snail and slug trap.
Final words
Thai basil needs good fertile soil in the growing season. Later, this annual herb does not ask for much fertilizer. Growing Thai basil is not a difficult task. The plants ended up watering, but again you need to give controlled watering. Regular moisture is good till you are giving it lightly to the plants. The cutting of old leaves and flowers again makes Thai basil fluffy and bushy. The seeds can be got only from flowers so don’t remove flowers if you want seeds for the next season’s growth. We hope you like this article and know what to do now. Don’t wait further, let the drill begin! Happy planting!